Installation Tips for Natural Stone Thin Veneer
OUTDOOR INSTALLATION PROCESS
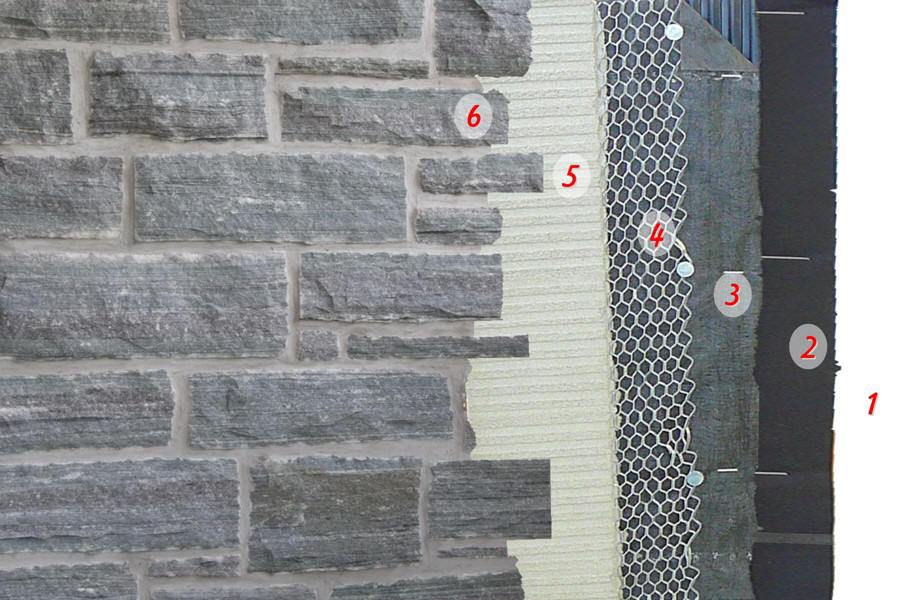
- When installing Thin Stone Veneer, always make sure that whatever type of surface you are covering is clean and free of debris
- If you are applying the veneer to an exterior surface, cover the entire surface with a moisture control barrier
- The MTI rainscreen is an effective drainage plane / mat to get the water out quickly; even a small amount of water can lead to mold and rot
- Secure a galvanized metal lath to the surface to ensure that the lath is secured properly, use heavy staple or galvanized roofing nails long enough to penetrate into the studs
- Apply a thin coat of Type S Mortar, and allow mortar to set
- Evenly spread Mason Bond 400 or an equivalent Thin Set material to the back of the thin veneer stone. Press the stone firmly into place. When joints become firm finish to desired appearance
INDOOR INSTALLATION
- Cover surface with Plywood or Cement Board
- WITH PLYWOOD – Use PL Premium to apply Thin Veneer. If you use PL Premium you should use screws to keep the Veneer pieces from sagging
- WITH CEMENT BOARD – Use PL Premium or Mason Bond 400 to apply Natural Thin Stone Veneer
- When joints become firm, finish to desired appearance


Leave a comment
This site is protected by hCaptcha and the hCaptcha Privacy Policy and Terms of Service apply.